Track the T
Keyboards go through a lot of punishment in their lives. Since my current keyboard replaced the useless one that came with my PC and needed a ton of pressure on each key just to register anything, it's been having a tough time - mostly because of my habit of eating breakfast at my desk and spilling incrementally large quantities of sausage and egg into it. As we were moving the PC about last week we decided that it was now revolting enough to consider cleaning it out. However, this is normally a dull process involving cleaning between and under each key with an awkward implement fashioned from a cotton bud and paperclip. Not being a normal person by any stretch of the imagination, I instead opted to use the dishwasher. Now, a lot of people think this is a mad idea - electronics and medium to large amounts of water have rarely got on well together. But if you can get inside it and strip out all the sensitive bits, it's all just plastic. (The page about this I first looked at described just throwing the whole thing in, but I felt that this approach was a bit too stupid even for me.) So we got the screwdrivers out and set about dissembling it.
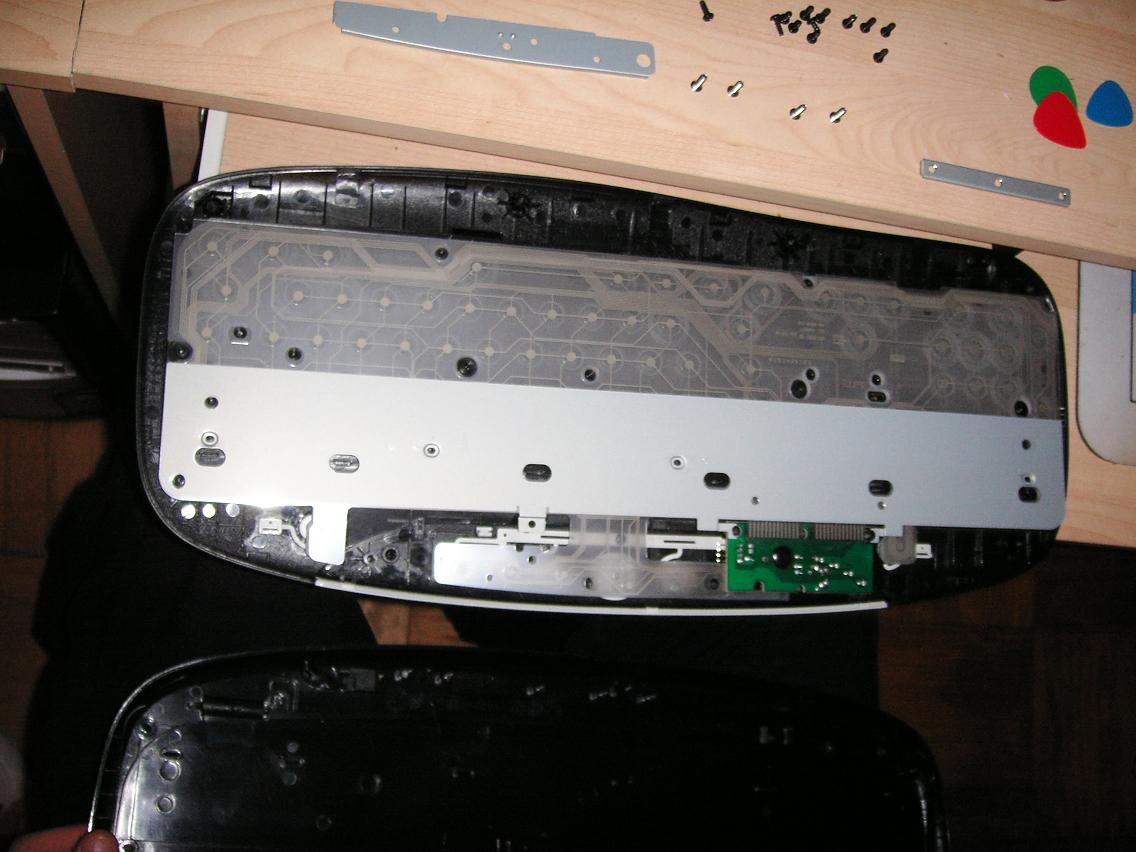
The photo shows it with that cable off - the circuit board in the bottom right is for the Num Lock, Caps Lock and other LEDs, and most of the rest is taken up by a large sheet of pressure-sensitive film and contacts. Underneath that is the layer of cushion that presses on the contacts when you hit the keys, and with that off, you're left with just the rack of keys at the front. With everything neatly laid out on the table, we put the two halves of the stripped keyboard into the dishwasher along with the usual stuff, turned it on and went to do something else. The next step was drying it out - even with the dishwasher's drying period some moisture had been left on the keyboard's many crevices, so we blasted it with a hairdryer for a while before I felt confident enough to piece it back together. The difficulty with this part was that even though I had specifically remembered that the cable attached to the top then the bottom half of the keyboard, I was completely unable to remember where it did so - a problem that was only solved through process of elimination as I put the other screws back in. This is where taking the photo slightly earlier would have come in useful. Nevertheless, we got it plugged in and switched on eventually. As I've said before, as long as you know how to put things back together the way they were, there's little danger of destroying them. Which is why I was worried to discover that it was completely buggered. Everything still felt fine on the surface, but I'd lost the use of most of the bottom row of keys. For a while, it looked like I would have to plug in the old keyboard, but after leaving it open overnight to dry out completely, and spending a frustrating morning putting in every single one of those tiny little screws, it worked perfectly again. Whether it was because of some moisture or due to me not exactly following the original way that the cable comes into the keyboard I don't know (it's like a Chinese metal puzzle, needing to be looped back under itself once it's plugged in to three different places), but it's a relief to have it back - and sparkling clean, as well. So a final word of advice - if you're thinking of doing this, then it's probably easier to just get the acetone and cotton buds out instead. But if you've got a cheap keyboard and an electronics shop just down the road, there's no harm in trying it. 2008-01-15 11:03:00 1 comment |